Sunday, 12 February 2012

Nottingham Light Night

My DH and I have just had a very cold but very enjoyable weekend with some friends over at Nottingham.  We met up with DH's fellow photo blogging friend Gailsman for Friday nights' Light Night celebrations and also to see DH's son performing with his Indie Band Red Shoe Diaries at their single launch party.


After a bit of a false start the front of the Council House was illuminated with changing patterns of light which were great inspiration but a little tricky to capture with the camera.  


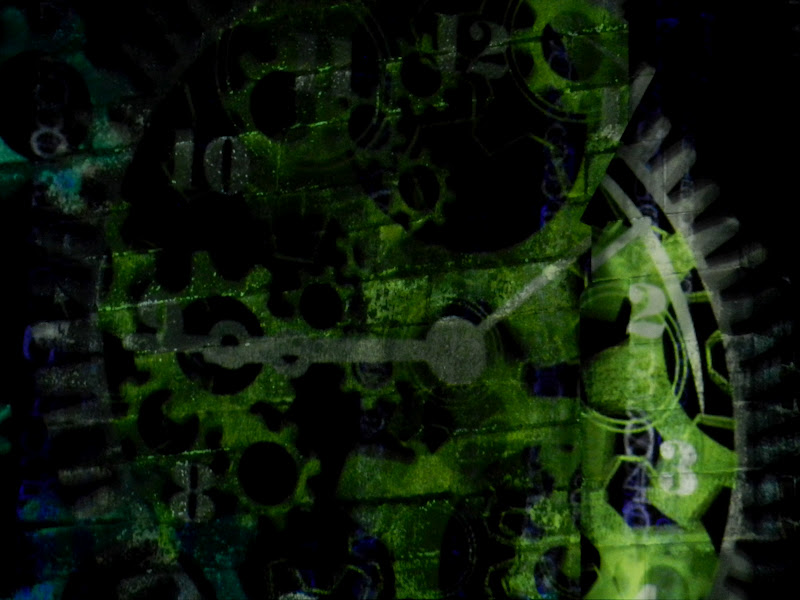
These lovely clockwork images were all moving and were projected on the curtain wall of Nottingham Castle accompanied by a couple of daleks and a TARDIS.  We didn't get close enough to the daleks to be in any danger ;-)  It was very slippery under foot around the castle as there had been recent snow fall and it was freezing hard.  You can find some more images on my DH's blog here.

While we were in the castle grounds we were witness to a very romantic occasion,


 This very large heart was displaying messages throughout the evening and as we were looking at this one a young gentleman standing next to us went down on one knee! Sadly no pic of that.  The very surprised and delighted Sylvia said, Yes!

Aaaaaaaah!  I hope they are always as happy.  

Not to be outdone my DH had his say

Bless! xx
As did our friend Gailsman


 Who said romance is dead?


These illuminated figures were a lifesize family made from recycled plastic by Sarah Turner.  

To wind up the evening we went to the Cafe bar at the Nottingham Contemporary where my DH's son was performing with his Indie band Red Shoe Diaries .  It is not easy to get photographs indoors while everyone's moving but I managed one


 My stepson is partially hidden behind Leanne, the female vocalist.  The evening was a great success and launched their new single Ice and Snow.

You can listen to their music if you wish on Youtube


And here in Paris in 2010.


And finally

Since Dilly was asking me where my hat was the other day here's another hat photo taken in the lift at Nottingham Castle on Friday night.  Not a clue who the strange people in the background are ;-)

Monday, 6 February 2012

Snow Dyeing Results

There's nothing like a bit of snow to get you blogging every day ;-)  So, withiut further ado, here are the results after the fabrics were rinsed with cold, warm, hot with Metapex, lukewarm and lukewarm water (cos I can't stand the cold) and then spun and ironed dry.  The Metapex, or Synthrapol, is a detergent that holds the loose colour in the water and stops it going back into the fabric thus shortening rinsing time and saving sore hands.  (Many thanks to Annabel who gave me this tip a long time ago).


This (above) is what the silk noil and silk scrim from yesterday actually look like.  The colours from the scanner were well off the mark.


These colours are not totally accurate but they do show the exciting marks that the snow has given.  They remind me of storms brewing or of gas clouds in space.

The next images are from the tray dyeing,


Above is a piece of 80/20 batting, cotton velvet and a scrap of vintage cotton doily.


And finally the pieces that were in the pot


I can't remember what the fabrics on the left above were but I think one is a bamboo cloth.  On the right is the overdyed onion dyed cotton and the light fabric is Evolon.


This piece above is a very old piece of cotton sheet that is very thin and worn but which has taken the colour at the bottom of the pot beautifully.  All of the colours are a bit more turquoise than the computer is showing.

I am quite pleased that I did get some nice greys in a couple of the pieces and the rest are all leaning towards turquoise with deeper tones, all of which will make an appearance in some future project.  As ever I used a range of fabrics to see what happened but sadly I didn't note anything up so I can't be sure what I was using if I wanted to repeat the exercise.  Will I never learn? lol

My erosion bundles enjoyed sitting under their coating of snow for a couple of days and some of them disappeared completely from sight.  There are two bundles sitting under the snow on top of this old watering can.  What mysteries await?


Sunday, 5 February 2012

Snow Dyeing

You would think with the first snowfall of the year in this part of the country it would have been a good excuse to snuggle up with a good book and not move all day.  Did I do that? No!  I ran myself ragged playing with snow and dye and in between did some fabric printing (more of that another day).

First off our friend came round and took DH off for a walk in the snow for some photography and a lunch in town,


Bless!  Anyway that left me free to play! :-) (Poor Mum has missed out on her usual Sunday with us because of the snow.)


I have done snow dyeing before but this time I took a leaf out of Gillian Cooper's book (from her article in the March issue of Popular Patchwork) and mixed the dyes in water bottles.  I always have trouble deciding what colours to use  and not surprisingly I used a range of blues (teal, turquoise, medium blue, and navy) and an orange.  I'm hoping that I will get some nice sequences of blues and some soft greys (that's what blues and oranges in paint would give assuming you use a 'cold' blue with a warm red/orange).  I soda soaked the fabric before I started and put a tiny spot of washing up liquid in each bottle as I think that's supposed to help the dye powder mix, especially the reds. (about 200mls water to teaspoon dye powder, lid on and shake) . I then put upturned foil dishes in my tubs and scrunched up the fabrics and put them on top.


I piled the snow all over the fabric and then squirted the colour from the bottles, moving the snow here and there to squirt into the middle of it.  I left the tubs outside for a couple of hours and when the top snow began to look pale I took that off so that the mix wouldn't become too dilute (sorry, didn't photograph that).

In addition to the snow dyeing I did a tray dye too with some small pieces of fabric,

I pleated the fabric into the tray and then squirted the dye over and into the creases but didn't worry about leaving white areas for the dye to move into.

I decided I had got some dye left over so I quickly soda soaked some more fabric and filled a small tub and squirted dye onto each layer, starting with the lightest first.


I just hope that the snow dyeing did have enough dye in it or I shall wish I had put more into that.

The snow was removed form the tubs after about 5 hours and I've put the fabric in a plastic bag along with the fabrics from the tray and small tub and brought them indoors to batch.  I haven't done this before but I was so tired by now that I couldn't face rinsing it all out till tomorrow.  I did however rescue some pieces of silk noil and silk scrim that had been snow dyed and rinsed them out.


I have scanned these and they are nothing like the actual colours so I'll photograph them tomorrow and see if I can do any better.  They are much more turquoisey and subtle than this shows them to be.  I do love the marks though.

You may have noticed I havn't mentioned salt solution, that's because I forgot to use it again and ended up pouring it over the snow after a few hours.  One of these days I'll remember to mix it in with the dye!  

There are lots of different ways to dye with snow and if you have a look in Google I'm sure you'll find other methods.

PS I did use a face mask to protect myself from the dye powder until it was safely locked in the water and remembered to wear rubber gloves throughout.

Saturday, 4 February 2012

Onions, Onions lalala!

During my blogging rambles I came across a post about boiling fabrics in (red) onion skins as a way of dyeing them naturally and as I have been saving red onion skins for some time for just that purpose I decided to finally get the pan out and give it a go.


I've got an old aluminium saucepan that my father-in-law had finished with and put various pieces of folded and clamped fabrics into this and boiled it all up for about half an hour.  The clamps consisted of pegs, bulldog clips and also some plastic triangles to hopefully achieve some additional marks.  Everything was left in the water overnight (not with any heat under it!).


I was quite surprised by the colours I achieved and also by the intensity of the colours on some of the fabrics.  Above is a cotton hanky that was folded in triangles and clamped with pegs.


Above is a very pale offering of an old nylon curtain.  I'm excited to use this as an overlay.


What about this fabulous silk and silk dupion above! I couldn't believe how strong the colours are.
 

Above is a piece of gauze folded in triangles and held by a bulldog clip.


This piece of cottton was folded round 4 triangular pieces of plastic but the marks are not very strong.


Finally a small square of cotton held by a large bulldog clip and some beautiful vintage broderie anglaise. I also dyed some threads but sadly forgot to photograph them.

I had expected to get redder tones from the skins so all of these were quite a surprise.  I am thinking about using them in the International Quilt Challenge Archi-texture piece.  Watch this space! (I've saved the liquor from the onions to boil up again as it was pretty dark and may give some more colour yet).

And finally, all the while I was playing with the onions this little ditty was running through my head


 A toon from my yoof!

Friday, 3 February 2012

Sketchbooks and Collages

When I was with Linda and Maggi on Tuesday we were talking about collages and sketchbooks so I thought I would post a few more of my sketchbook/collage pages for Maggi. I am very poor at keeping a sketchbook but I do keep various books of notes, images and ideas which are very scrappy and often have papers hanging out of them waiting to be stuck in.  However, when I am on holiday I do enjoy pottering about in a book and making collages.  Here are a few made over the last year:


The one above is similar to several I have made before on a theme of St Ives Bay and includes painted and printed papers, fabric, monoprinted tracing paper, painted paper towel, painted newsprint and tissue paper.


Above is 'You Shall have a Fishy' with the same ingredients as the one before plus sewing pattern, sisal and found grass.


This 'Fishy' one above could do with some more work.  The squiggles were made as a resist of correction fluid painted over with watercolour.


Lots of transparent tissues above.  The suggestion of turquoisy text showing through is the reverse of   Sharpie on the previous page.

  
Watercolour pebbles above.


I had fun making this little collage above the other evening.  It's not finished but it's based on the image on the left hand page.

The only problem with making collages is that you end up with yet more scraps of paper and fabric that you can't bear to throw away!  How are you getting on Maggi?

Wednesday, 1 February 2012

Friends

I heard from Hilary who is co-ordinating the Celebrating Diversity quilt that my 'In an English country Garden' quiltee would be in time to be considered for the compilation quilt so I have my fingers crossed for being selected.  The finished quilt will be displayed at the Quilt Museum in York and at the Festival of Quilts at the NEC in Birmingham in August so I shall get to see it in one location or the other, if not both.  I'm pleased to say too that Mum loved the quilt I made her and has taken it back to her care home.

Yesterday I had a wonderful day meeting up with two blogging friends whose blogs I have been following for some time and who I met very briefly at last year's FOQ.  Sadly we all failed to take a group photo to mark the day so I have been very cheeky and borrowed one from Maggi (sorry I didn't ask first Maggi, I'll take it off if you would prefer).


The other lady in the photo is Linda who blogs as Blue-Eyed Girl and it was Linda who had planned the intinerary for the day.   And what a day it was!  After picking me up from the train station we went to The Beetroot Tree which is owned and run by Alysn Midgelow-Marsden who is well known for her work with metals in textiles.  She also wrote the book 'Between the Sheets with Angelina'.  The Beetroot Tree is a wonderfully inspiring creative environment also a very tempting place for shopping!


I very naughtily couldn't resist the beautiful shot velvets in my favourite sea colours and Maggi gave me some tips on how to burnish the stainless steel metal fabric to change its colour.  I can see a use for the metal fabric and the embroidered silk in the piece that I should be cracking on with for the International Quilt Challenge (only 23 days till the deadline!).  I have plans for that little piece of embroidered silk in the project too.

Next it was on to lunch at a lovely cafe and foodstore in nearby Breaston called Anderson's and then more cups of tea and a visit to Linda's home and art room.  It was really great to see Linda's beautiful embroideries in the flesh and to meet her gorgeous cat Peachy who took to me because I had been eating a tuna sandwich and the smell was still on my hand :-)  It is well worth clicking the link higher up to visit Linda's blog and see her beautiful work and to meet Peachy, he's a very cheeky cat!  Linda and I share a love of St Ives so you can catch up on a few views while you're there.

 Before Maggi drove me back to the station for my train we went to Pear Tree Yard, a craft warehouse which was more like an Aladdin's cave!  Fortunately we didn't have too long to shop but I did buy a couple of things,


I was really pleased to get these gel stamps which are a series of circles that can be used in many ways and combinations.  You can split up the larger circles and use the middles separately.  When not in use they store conveniently in the tin.  I'm hoping these might come in useful for the Archi-Texture project too.  

I had taken Linda and Maggi a small gift of mixed fibres and fabrics as I knew they both have embellishers but they had both brought me a proper gift. 

Linda gave me the decorated book with her very pretty digital and textile collage on the cover and Maggi gave me the gorgeous wallet which shows off her very skilled machine embroidery. 
We were talking about being of an age to benefit from a Senior Rail card and once I get to my 60th birthday later this year I shall be using this wallet for my card and travel tickets.  It will save me grovelling through my handbag and panicking for my tickets!

My busy day yesterday took its toll and I have been very lazy today, although I have done a little bit of dyeing with onion skins and, after chatting with Maggi about collage yesterday, I've made a couple of small collages which I'll photograph tomorrow.  At the start of the year I had planned to do a collage a day but so far haven't done any so maybe I should start now.  I may even use Linda's book as I like the square format.

Thank you Maggi and Linda for a great, fun day out and I hope we can get together again soon.  It was great to spend time with like minded people and we never stopped talking, did we? :-)

Saturday, 28 January 2012

In an English Country Garden and a quilt for my Mum

Well, I've finished it!  The hands are complaining but I've managed to finish the piece I started at Peterborough and if I can just get it in the post early enough on Monday I may be in time to have it considered for the Celebrating Diversity Quilt which will be displayed at the Quilt Museum in York.


I am really pleased with this little piece.  It is 20cms square (not 8" which is slightly bigger than 20cms, ask me how I know!) and is made entirely from recycled fabrics.  I decided to continue the decorative stitching around the yellow rose even though it is part of the base cloth and therefore didn't need securing but I felt it balanced everything to have it stitched.  I finished the edge in a very close hand stitched whipped or satin stitch which took several hours to complete and then 'quilted' the open areas and the crinoline lady by invisibly stitching tiny stitches throughout to hold the top layer firmly to the wadding.  

I've also finished the bed topper I was making for my Mum. (Ooh! I don't think I told you about that before).


Stylishly modelled by the invisible man (otherwise known as DH) the quilt is 120cms by 150cms and has been backed with a fleece that I bought in Sainsbury's.  I designed the quilt around the centre panel that I had bought a year or more ago at The Stitchery in Ruskington, a village near me.  The two panels started out life side by side so I cut them apart and put them one above the other. They are a design from Clothworks called Garden Path, quite appropriately.   The strips were cut at 3.5" as that fitted in better than a 2.5" strip and was less sewing!  I've turned the edge under and stitched it down so that the fleece shows at the front and embroidered Mum's name so she can feel safe that it won't get lost in the home.


Excuse the ropey machined hearts around the edge.  I had a hard time controlling the flow of the fabrics under the needle and got some very wonky shapes in the hearts! 

After all that creativity I am in need of a lie down in a darkened room but there's not much likelihood of that this week as I have lots to do including an exciting day out planned for Tuesday, more of which after the event ;-)